🛠️The Pro
To know how to use AD 20 Aluminium Framing and Ply Wood module structures you will need experience in cutting machines for metal and wood.
V-Slot 2020 Aluminium Frame
Best way to build a stronger, lighter RV interior framing
Better way to build a stronger and lighter RV interior framing. How to build a van camper interior construction ideas. If you are starting your van build or planning to remodel your conversion van in the future consider building with AD 20 aluminum framing studs. It is a stronger and lighter solution to building your custom conversion van interior framing.
80/20
Using AD 20 aluminum framing reduces the weight and bulk of 2X4 or 2X2 wood framing. It also save in space wood takes up. This lightweight AD 20 aluminum framing opens up a wide range of building ideas for a conversion van interior framing.
80/20 RV bed
When using AD 20 if you decide to change, remove a wall or panel it allows you the freedom and easy of doing so. It provides a strong alternative to mercedes RV construction interiors. AD 20 frames can be easy secure to the floor, sides and ruff when building your cabinets, counter tops and bed top. Doors and different material can be used as wall finishing.

Check out the photos below on a mercedes RV build and how the interior framing was constructed used and different options AD 20 can provide in your van camper build. Building your #vanlife! The following photos will give you some van conversion ideas. Ambulance camper conversion ideas
Building with AD 20 aluminum frame kit

6 Best Reasons to use AD 20 for your RV interior build
Lightweight van interior
Easy to use
Multiple uses like side panels, sliding drawers, cabinet doors in your van camper
Sturdy build by attaching lag bolts to the van walls and floors
Easy to modify at any time
Clean and modern design
DIY Aluminum Cabinets
AB 20 aluminum framing
80/20 Inc., 1010, 10 Series, 1″ x 1″ T-Slotted Extrusion x 97″

10 Series Modular Extrusion with Four Open T-Slots
Compatible with all 10 Series Fasteners and Accessories
Four open available T-slots for mounting accessories
Great for furniture, displays, trade show booths, or any project requiring a finished look
Made out of 6105-T5 aluminum (or equivalent) with a clear anodised finish
8020 aluminum in your van build? These tips and tricks will help you survive


Boeray (20s) 3-Way End Corner Bracket Connector for Aluminum Extrusion Profile 2020 Series (Pack of 4, with Screws)
DIY Van Galley
Build an amazing mercedes sprinter RV interior using AD 20 Aluminum modular framing for a strong, lighter and modular van RV interior.
How To Build A Van With 80/20 Aluminum (INSANELY STRONG)

8020 Camper Build


8020 aluminum RVV build

8020 aluminum van bed frame

PZRT ALUMINUM PROFILE CONNECTOR SET, 4PCS 17MM X 20MM CORNER BRACKET,8PCS M5 T-SLOT NUTS, 8PCS M5X8MM HEX SOCKET CAP SCREW BOLT FOR 6MM SLOT 20 SERIES ALUMINUM PROFILE


BOERAY 20PCS BLACK T SLOT L-SHAPE INTERIOR INSIDE CORNER CONNECTOR JOINT BRACKET WITH SCREWS AND WRENCH TOOL FOR 2020 SERIES ALUMINUM EXTRUSION PROFILE SLOT 6MM


Ply Wood structures
First part by By Woodbrew
Step 1: Cut Out Plywood Parts


This project requires you to cut a lot of plywood and if your familiar with that it can be a really tricky process breaking down large sheets. Its also really confusing to remember what all to cut and how it should be arranged on the plywood. We will have full plans available once the entire van is done to make that process much easier.
We used this material mate cart from Rockler help manage those sheets of plywood and as you will see we practically built everything on top off it. After many cuts at the table saw we gave everything a good sanding as it will be difficult to do that later.
Before assembly, we used a technique of raising our table saw blade into the plywood and then stopping short of the end to create a perfect rectangular hole. This will be the opening of our side cabinet. This technique is a bit dangerous so only do it of your comfortable. A Jigsaw will work just as well for this application too.
Step 2: Assembly


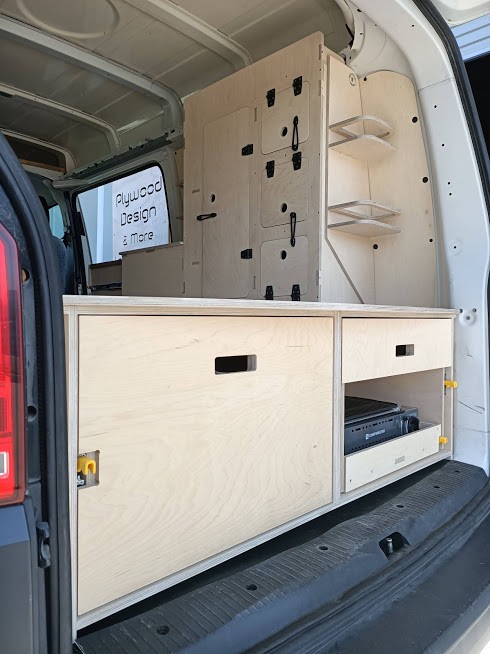
First we are assembling the side cabinet that will later attach the to two larger ones. This cabinet is positioned on the passenger side right behind the front seats. For this entire project we used Moreland Ultralight 1/2” plywood for the long sides and bottoms then Ultralight 3/4” plywood for the tops and ends.
Using brad nails we tack everything together insuring that everything is square and flush as we go along. For the connections into 3/4” plywood we used these power head screws and for the 1/2” connections we used small finish head screws. Be sure to pre dill these connections to insure there is no splitting.
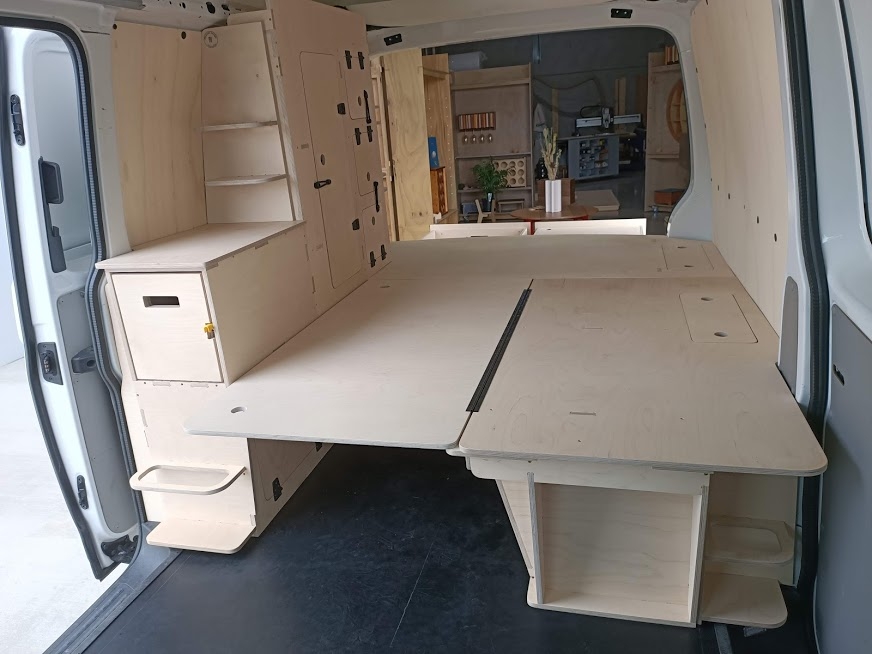
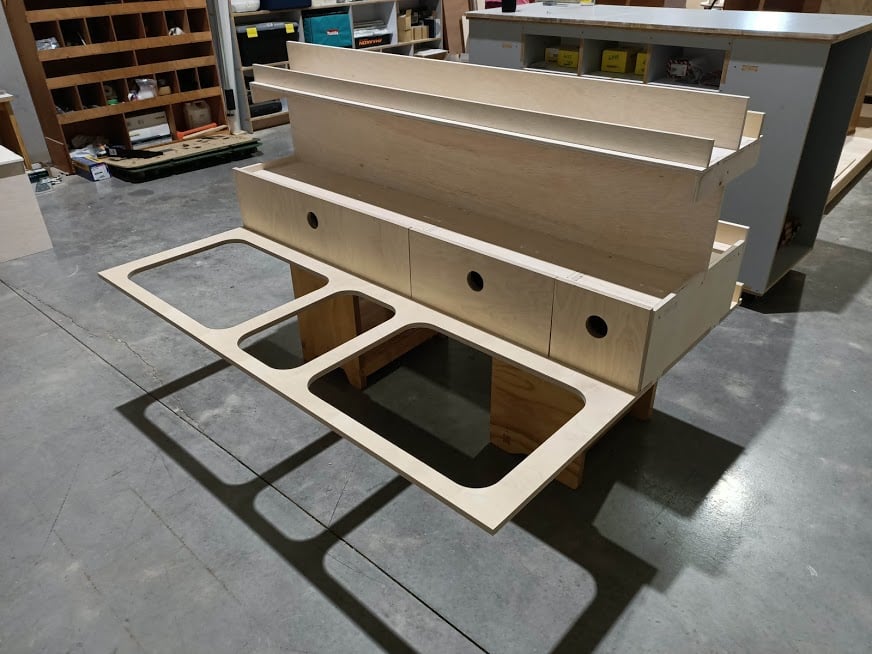
Next we need to assemble the back two boxes. These boxes share one large bottom piece, but first we will assemble the box sides and tops separately. These boxes will also have a have pullout drawers so one end will be left open as well. I’ll skip the assembly as it was the same steps as the prior box.
We laid the two boxes on the ground face down and set the large bottom piece on top. Carefully measuring the location of the sides we made marks for where our screws should go. Then using the powerhead screws we attached both boxes down. Make sure everything is square before attaching the boxes. We made the mistake of skipping this and our driver side box will a little off.
We flipped the box back over and slide our first assembled box into place. This box is offset to take advantage of the extra width in the van where this box sits. We used these connector bolts from Rockler to secure these boxes in place. These are great because it allows us to easily remove the box in the future and provides a solid connection. The bolt is a smaller diameter than the nut so first we used a small drill bit for the bolt and drilled through both boxes. Then using a larger drill bit sized for the nut we just drilled through the back box. After attaching these together, we flipped the box up on its end to make the next step easier. We attached a 3/4” plywood panel across the back of the two connected boxes. This will help stiffen the boxes up, give us a place to attach the table mount, and give a place for the bed panels to sit on. We used the same powerhead screws to attach this in place.
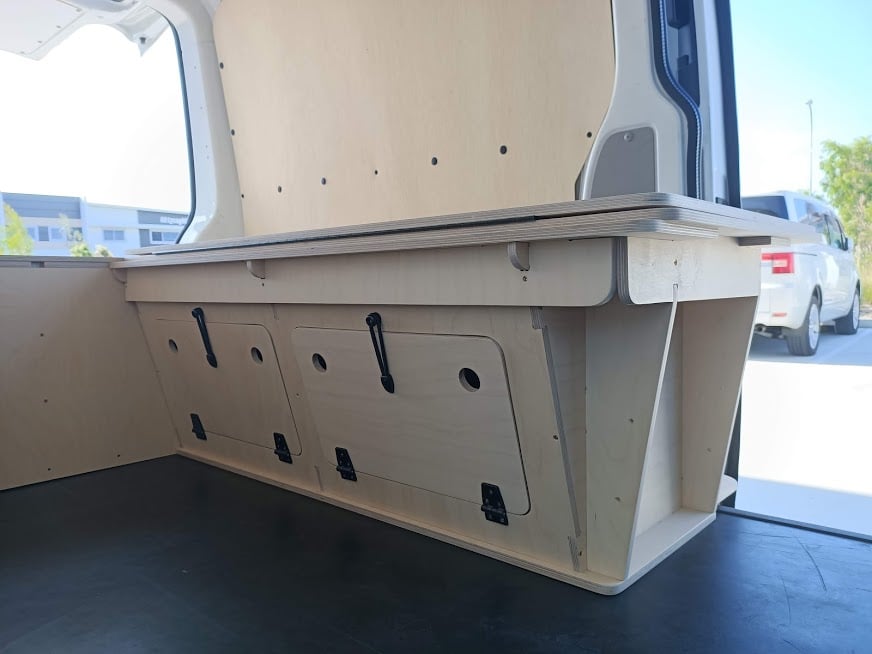
The gap between the two boxes will serve as an area for out feet to go while sitting down, but we need a way to fill it in while in sleep mode. In order for our table top to drop down and sit flush with these two boxes we added strips of plywood to the sides to support the table top. We screwed these in with the same powerhead screws. This may be a little confusing now, but it will make sense in our future bed project.
Step 3: Painting


With assembly done it was time for paint. We chose to prime everything with a mold killing primer to kill anything existing on the plywood, but more so to prevent mold from forming in the van. When you sleep in the van condensation is bound to form at some point and we wanted to insure no mold formed. After rolling on the primer we painted everything with a semi gloss gray paint.
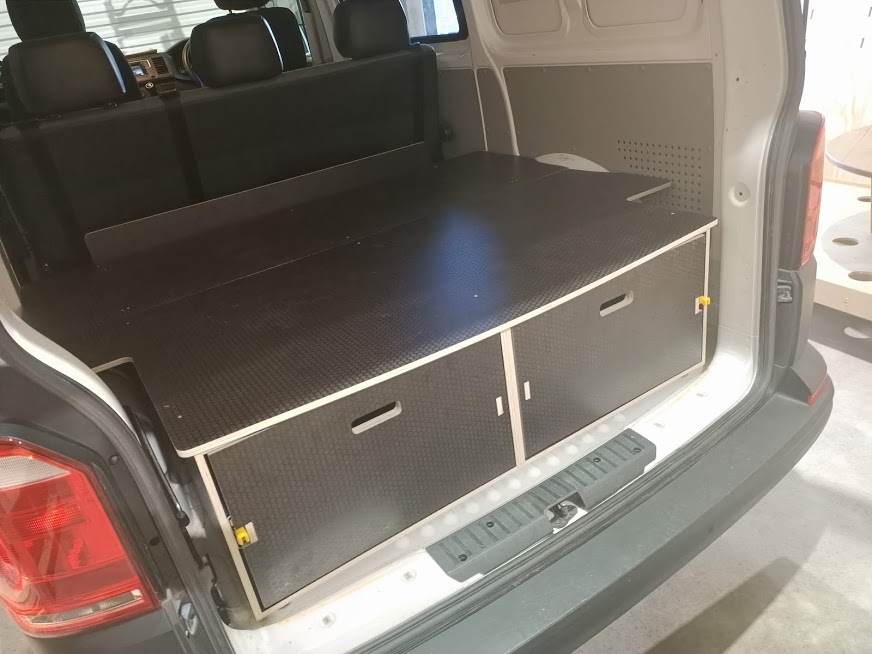
Step 4: Carpet & Aluminum


To ensure the longevity of the boxes we went a step further and added aluminum angle iron to the edges of the boxes. For the tops we used 3/4” angle and cut a 45º notch out of one side of the angle. Cutting the notch out instead of cutting through the entire angle allows us to bend the corner and create a smooth edge. We cut one notch at a time to ensure we got the fit just right. The miter saw came in handy here and if you weren’t aware aluminum is soft enough to use wood working tools on which opens up endless possibilities for different projects. The angle iron is attached using these small pan head screws. The reason we didn’t counter sink is that the aluminum ins only 1/16” thick and the counter sink would just enlarge the hole. The rest of the aluminum pieces didn’t need to be cut on 45º angles and were much easier to install. The angle iron in the floor will add strength to the boxes side walls and keep the carpet from coming up. We also added angle iron to the tops of the support strips to keep the from being worn or chipped. Lastly the side box got 1/2” aluminum channel on the inside lip of the opening. I’m not to sure i like the way this aluminum looks, but it defiantly adds a lot of durability to the project.
Step 5: The Future


Thats where this project page is going to end, obviously we’ve done a lot more to the van but we actually had to throw everything in to get on the road. We are going on a month long road trip and collaborating with some of our favourite creators from AL all the way up to New York City and basically doing a lot more cool stuff to the van like pullout drawers, adding the table, curtains, cushions, bed, and a few other really cool things so be on the look out for those they are going to be really fun.
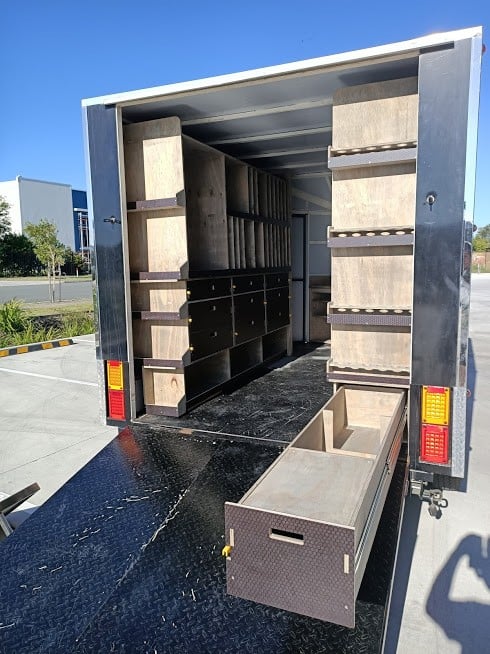
DIY Van Slide Out Storage
Second part by By Woodbrew
Step 1: Cutting Out Plywood


The first step in this project was breaking down all of the 1/2” baltic birch plywood we needed for the build. We will just be focusing on the left side storage box first. While Johnny and I cut pieces to width on the table saw, Molly was cutting pieces to length on the miter-saw. We used this awesome crosscut sled from Rockler to insure our crosscuts were nice and square at the table saw. Before assembly we went ahead and sanded everything with 180 grit paper.
Step 2: Assembly


When assembling the box we used wood glue, brad nails to hold everything together, and finally finish head screws to add some extra strength. Make sure you are keeping things square while assembling.
Step 3: Installing Drawer Slides


Next is was time to mount the drawer slides which was really tricky. This is a super tight space and johnny’s right angle drill really helped out here. We are using 34” heavy duty slides for this project. After attaching them inside the cabinet, we placed 1/4” spacers under the box and slide it into place. We pulled the box out slightly and screwed the slide into the box. We couldn’t reach the last screw hole and had to remove the box to finish screwing the slide down.
Step 4: Drawer Front


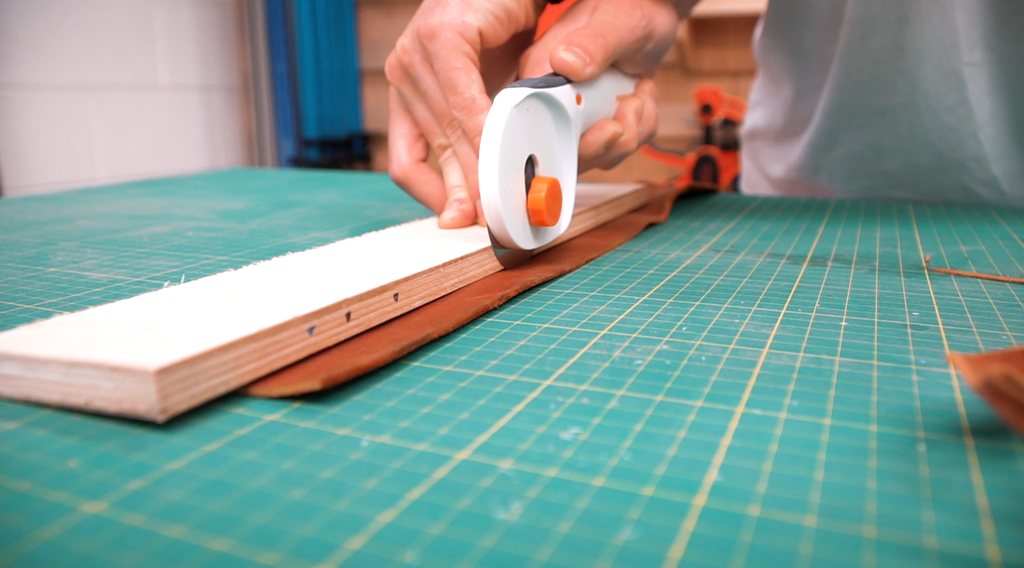


Last step for this side was to create the drawer front. Johnny cut a board to fit and used a clever trick with playing cards to get the drawer front centered. We cut a small strip of leather out using a rotary cutter and then punched a small hole for a screw to go threw. Using a finish head washer available from Rockler we screwed the leather handle on insuring that the screws we used would go all the way through and into the box to attach the draw front on. That wraps up this side and now onto the kitchen side.
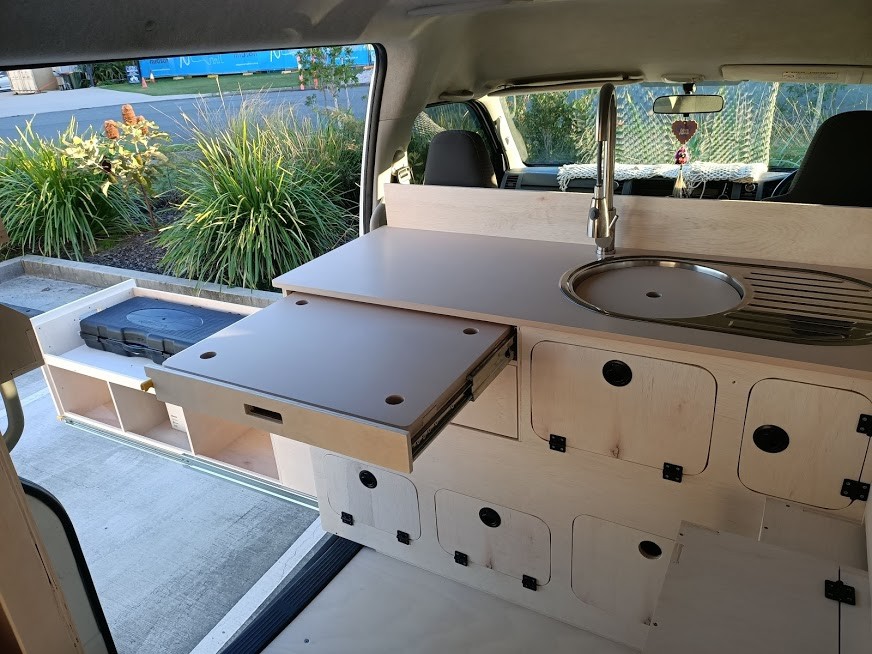
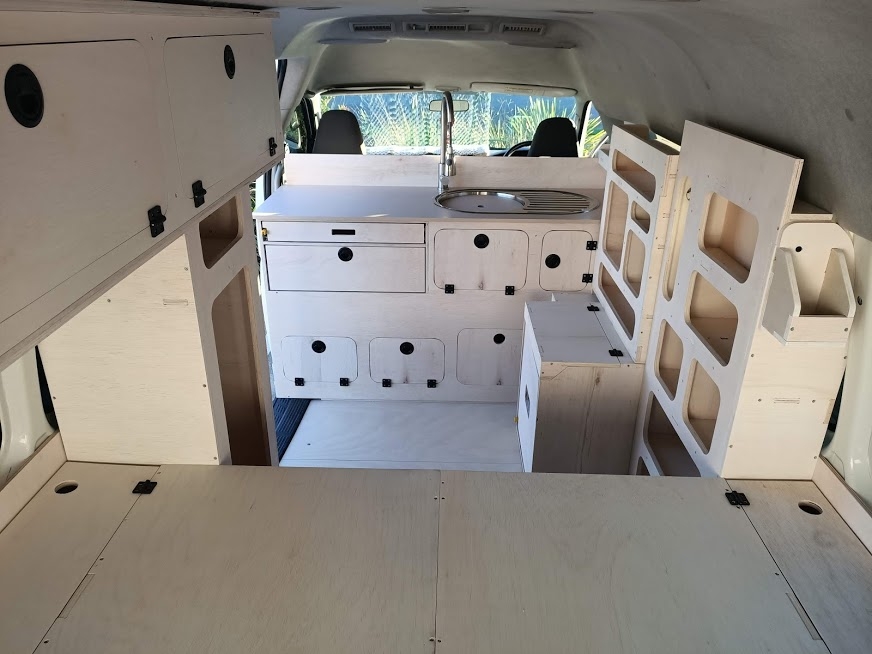
Step 5: Kitchen Slide Out


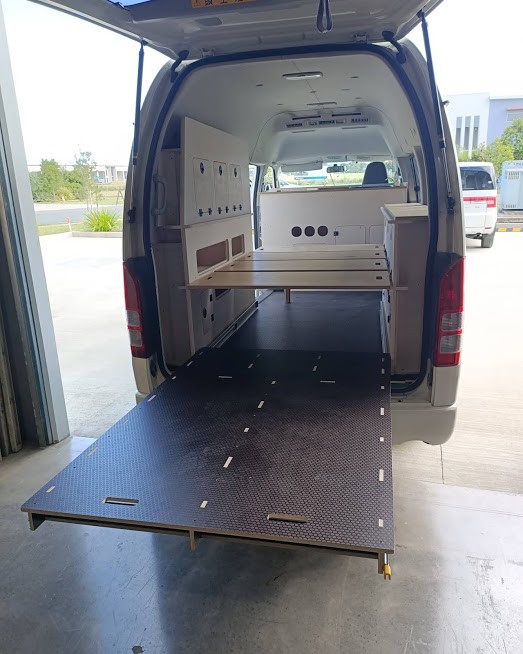
This pullout is different in that it’s just a platform and not a full box. The kitchen boxes will sit on top of this platform and will be able to be taken off and used else where very easily. We used the same method of first applying glue and tacking it together with brad nails and then adding strength with screws. This platform doesn’t have a bottom, only a top and it actually hangs over the edge a bit to cover up the drawer slide as you’ll see shortly. Last step in this project was to again attach the draw slides. This side was a bit easier as the opening was larger, but still required us to remove the box to finish the last couple of screws. With that in place the pullouts are done. To see the kitchen boxes being built be sure to check out Crafted Workshop's video.
Check out these other examples of plywood design:
Modular designs
Modular RV designs are becoming so popular these days they’re practically standard, as we’ve seen with the CargoClips modular RV interior and the PlugVan voice-controlled camping module to name a few. However California-based company Happier Camper has come out with something totally new and innovative that doesn’t rely on the typical floor rails or D-rings as most modular layouts do. Instead, they’ve taken an idea from their retro HC1 camping trailer which uses a grooved floor to which modular cubes can be attached and applied it to a RV, allowing the possibility to create sleeping and living arrangements for up to five people- think RV-sized Lego set.
A selection of the modular cubes available from Happier Camper.

The basis of this ultra-versatile system is Happier Camper’s unique floor, which is made of a 1.5” thick honeycomb fiberglass construction that is both light and super strong at the same time. This floor is fitted into a RV in the form of a 3 x 6 grid of tiles, at least in the case of a Mercedes Sprinter 144 which Happier Camper used as a prototype for their design. The fiberglass floor has grooves embedded in it to which the modules can be fitted simply by pressing them down into place, just like jumbo-sized lego pieces. The floor also comes with frame-mounted D-ring tie-downs for hauling gear, and a front drain which allows the floor to be easily hosed down, making the switch from camper to cargo van a breeze.
A look at the base floor with wheel arch boxes attached.

The modules that attach to the inside of the van are cubes constructed of a durable folded plastic which allows them to securely snap together. A variety of different things can then be added to transform the purpose of the cube, such as premium cushions, table-tops, counter-tops, lids and doors, all of which are crafted from a material called Lite-Ply, which is 55% lighter than regular plywood.
A nesting bench module with wooden lid- stylish and functional.

Carpeted floor panels can also be added in place of a rug, and locking hardware can be added to secure the boxes to fiberglass walls. Additionally, the furniture can be used either indoors or out, as all of the components are all made of rugged, durable materials.
One of the camper’s many layouts, with carpeted floor tiles and kitchenette.

Happier Camper offers a whole range of available components to customize the living space, everything from cushions to benches to wooden countertops to nesting tabletops. You can add in a cool box and kitchenette cube with an electrically-pumped sink to create a kitchen, or go one better with the deluxe kitchen option that has a pull-out fridge and stove as well as the sink.
The kitchenette block can be used indoors or out, just like all of the modules.

Better yet you can position this kitchen anywhere you want within the van; you could construct a huge cooking space along one side of the van, or move it to the rear if you want to cook with a view out of the back doors. You could add in a toilet cover compartment to stow a portable toilet, a trifold flat cushion to create an extra single bed, build two double beds, or you could go all out and convert the entire van into one giant bed to sleep the whole family.
Every kid’s dream: a bed that spans the entire room.

The possibilities seem endless; you could convert the van from a living space into a mobile office, then into a sales space or a mini toy hauler, as easily as lifting the modules out or fitting them back in.
A large surround seating area with the possibility of hauling gear too.

The only slight flaw in this design is that the van is only capable of seating two and it doesn’t seem Happier Camper has any plans to add in extra belted seats, so although the camper can sleep a family of five they won’t be traveling with you. Additionally, a shower module would’ve been a great addition in such a sizeable van, although with each of the components being removable the addition of fixed plumbing would make this a difficult feature to add.
The versatility of this concept makes it stand out from other camper van designs.

The Adaptive modular system is expected to retail for under $10k, which includes a floor grid, three benches and two wheel arch boxes, making it a very affordable method of converting a van. Happier Camper will also be offering a deluxe package including a toilet, kitchen, fridge, cooler and sleeping and dining arrangements for four, and they have also mentioned they will be branching out into kits for other types of van.
This system is not only one of the most exciting modular van conversion options we’ve seen, but also one of the simplest and most effective designs, making camper van living easy and affordable to just about everyone.
Last updated